Sunday, December 4, 2011

Deck the Halls With lots of Garland

Looking for a creative new idea to decorate your house around the holidays. Try any of these festive garland techniques. They can be used to decorate your tree, to hang in windows, or even suspended along the mantle. Lots of lovely ways to use them!

Garland 1

 This specific garland chain is a spin-off of the traditional one you made when you were little. You can use different colors of paper depending on your theme or time of year, but specifically I chose to go with a blue and red theme.


Supplies are easy, most of them you'll probably already have around the house. 

You'll need:
  • Paper - your choice of colors and patterns. The amount you need depends on the size of each circle and the length of the overall chain. I recommend starting with about 6-8 pieces of paper and see how much you have left and go from there.
  • Hot glue gun and hot glue (holds stronger and sets faster than a glue stick)
  • Paper cutter

1.2.

3.4.

  • Start by cutting your paper into different size strips as shown above (small strips: 2"x3/8" and large strips: 3"x 3/8" ). It is fun to mix and match different patterned paper with plain, solid colors to achieve a textured look.
  • Once all of the strips are cut out, just plug in the hot glue gun and start attaching the circles! The specific pattern that I chose for this garland began with gluing together about 4 small circles, then on the fourth circle I attached a large circle along the outside of the small one. Then continued right along with a few more small circles alternating the blue and red pieces in just a random pattern.
  • Once the desired length is reached, Voila! You have a fun, festive decoration for your house around the holidays.
Garland 2

This second garland strand is another fun and easy decoration to hang around the house. But what I like to do is use this garland as a ribbon to dress up my christmas gifts.

Supplies are easy, most of them you'll probably already have around the house. 

You'll need:
  • Paper - your choice of colors and patterns. The amount you need again depends on the size of the whole punch you use and the length of the overall chain. I recommend starting with about 8-10 pieces of paper and see how much you have left and go from there.
  • Hole punch - any shape and size ( I chose a one-inch basic circle, but you could change it up and use a star, snowflake, or even a heart hole punch).
  • Sewing maching ( This could be sewn by hand but I think it's much faster if you use a sewing maching)
  • Thread ( match the thread color from the paper )


1.2.

3.4.

  • Start by selecting your pieces of paper, and go ahead and begin hole-punching. I find it easier to punch out all of the pieces before you go to the next step.
  • Next I recommend laying out your selected pattern on the floor or table to make it easier to run the papers through the sewing maching.
                TIP: If you choose to use scapbook paper for the garland and don't want the white backing to show, I would suggest combining two circles back-to-back of the same pattern.
  • Then when your pattern is laid out, thread your sewing machine and start sewing the circles end to end with a straight line down the center, it's as simple as that.
You can make the garland as short as one foot in length to fit around one small box, or as long as ten feet to wrap around your tree.
 

Garland 3


 This third garland strand is by far my favorite. The idea sparked from the traditional cranberry garland that is strung together around the holidays. Instead of buying several bags of cranberries I found a cheaper alternative by using small marshmellows and painting them red.


Supplies you will need:
  • One bag of small marshmellows ( If you can buy the off-brand bag to save some money).
  • One can of red spray paint
  • A needle with a spool of thread ( I chose red thread to blend in with the marshmellows at the end)
  • Newpaper to lay underneith the strands while painting
  • Colored paper for the garland embellishment
  • Circle hole-punch
  • Scissors

1.2.

 The first step in creating this garland is to thread the needle using a piece of thread about two feet in length. The shorter the strand the easier it will be to thread the marshmellows. Then begin threading the marshmellows together leaving about three inches of string at the end of the strand.

TIP: Place the bag of marshmellows in the freezer about 30 minutes before you begin. By doing this the marshmellows stiffen and become much easier to string together without the stickiness.


3.4.

 Once you have several strands strung together, lay down some newspaper and begin spraying the marshmellows remembering to rotate each strand so that all sides get covered with the paint. Then separate the strands to dry competely.
   

5.6.

The next step which is always optional is to create the colorful embellishment placed through the garland. Start by punching out several colored circles in a color of your choice. Then take the scissors and cut about ten small slits all the way around the circle with one of the slits cutting all the way to the center of the circle.

7.8.

Now you can begin assembling the garland. Start by tying together the first two strands, then about every 18" insert the colored circles by sliding each one in through the longest slit in the circle. Alternate circle, marshmellow, circle, marshmellow, circle.

9.10.

Once all of the marshmellow strands are tied together and all of the embellishments are added into the strand, you can then fluff the paper by pulling apart the tabs all the way around each of the circles.

Then you're finished and ready to hang your garland!!


Furniture Finds

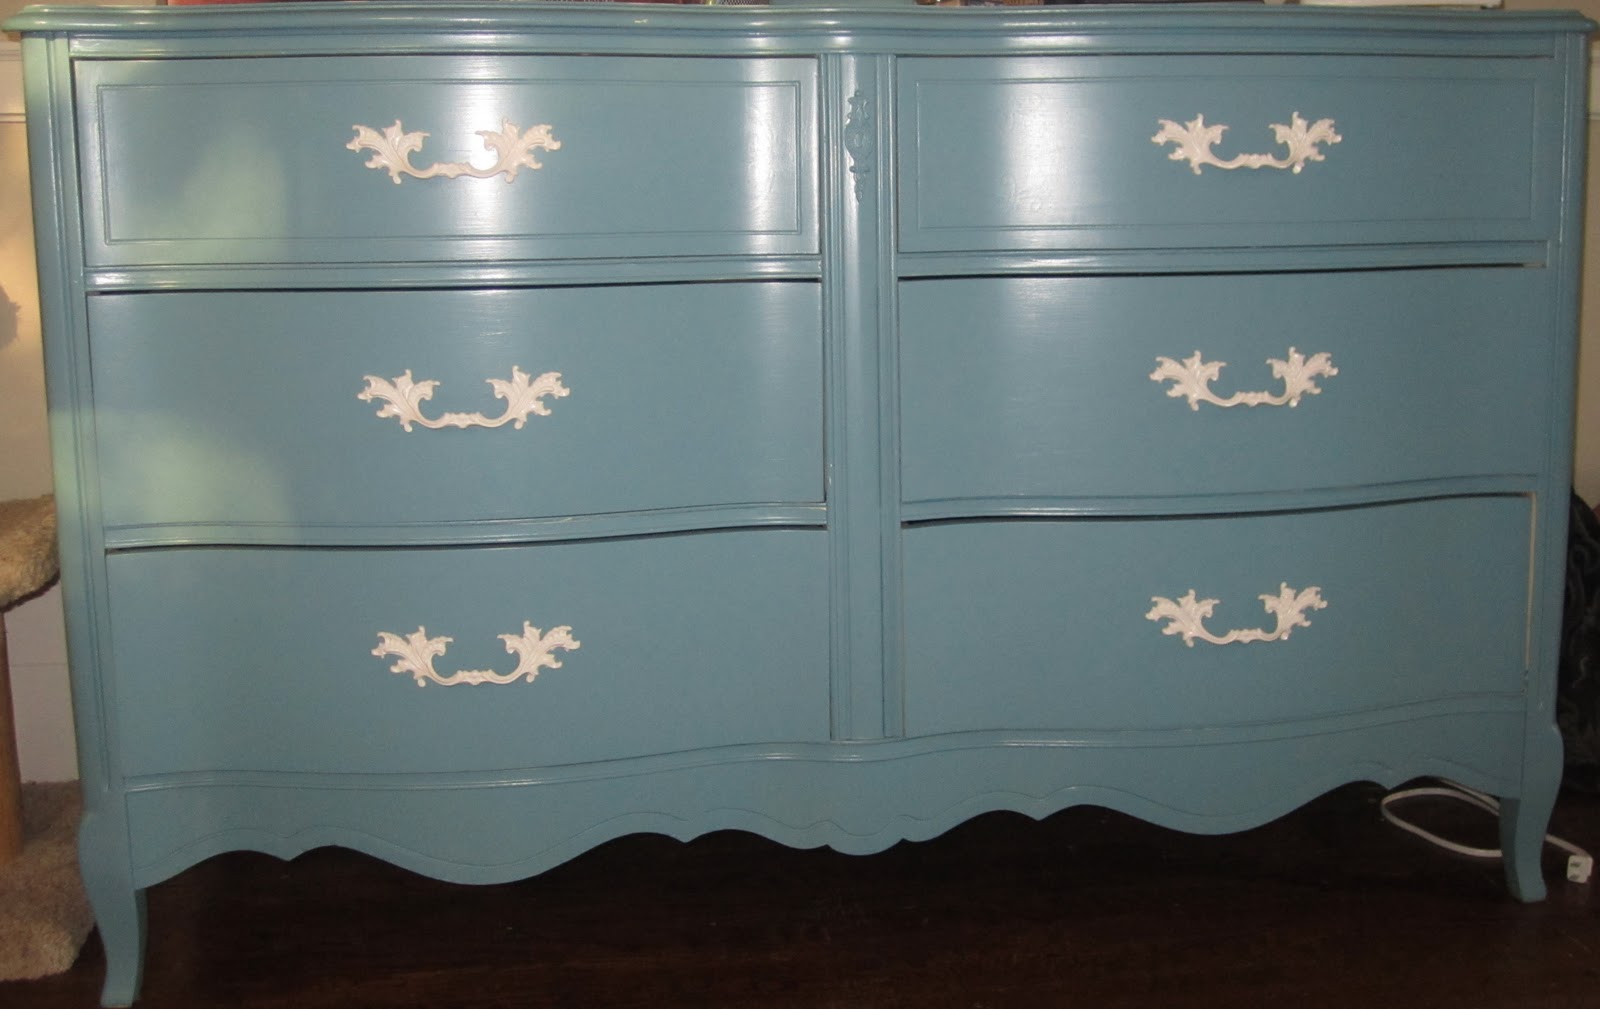
French provincial  furniture is one of my favorite types of furniture to paint. Its often uglier then heck and priced to move at yard sales and thrift stores but the form and detail that it has if you can look past the ugg is wonderful! 

This is what you'll find for a steel at your local rummage.

And this how great the furniture can look with a few coats of paint! The hardware was spray painted white, to match the top. I chose to leave the top alone and not paint it so that it would be the most durable and i wouldn't have to worry about paint chipping.

This piece of furniture was found, unpainted at La' Garage and Gallery.

Monday, November 28, 2011

CRAVE - celebrating stylish women entrepreneurs

I was super excited to be invited this fall to take part in this totally awesome guide of women owned business!  It just came out a week ago, just in time for holiday shopping! CRAVE is all about women business owners.  The book was designed to be a one stop shop for connecting with smart, successful women business owners and discovering new, innovative stores to shop at! The CRAVE book is acknowledging, celebrating and passionately supporting locally owned businesses. These neighborhood establishments enhance communities and are original, quirky and provide rich experiences not usually encountered in mass-market chains.

One of the best parts about purchasing this guide book is that it will pay for itself! The back page is packed with savings at the shops featured INCLUDING 10% off your total purchase Design Vertigo :o)  So hurry up and pick up your copy, sold at Design Vertigo and online at The Wilde Room! Only a limited number of copies available. 


Monday, November 7, 2011

Welcome to The Wilde Room!

Design Vertigo is excited to introduce The Wilde Room, our new online shopping option! Expanding our wonderful little store in North St. Paul to nice people across the country has been a goal for months!  We decided to showcase a limited, hand selected grouping of products that fit the style and price point of the Design Vertigo woman! The products will change often an with the season!  Check out the images below of the photo shoot for the new virtual shopping store.  
Big fat thank you to Senthor Creative for for helping little ole' me with creating an awesome graphic! 


So fun to do photo shoots, especially when I get to work with awesome people like Mike at Blu Dot Photography and my sweet friend Tiffany! 


Friday, August 26, 2011

Chicken Noodle Souper-Duper!


Making the perfect bowl of Chicken noodle soup is not something that can be mastered the first time you make it. Nope, it takes practice (and in my case a good teacher) but I officially make awesome soup, if i do say so myself! and in this post I'd like to share a few tips.

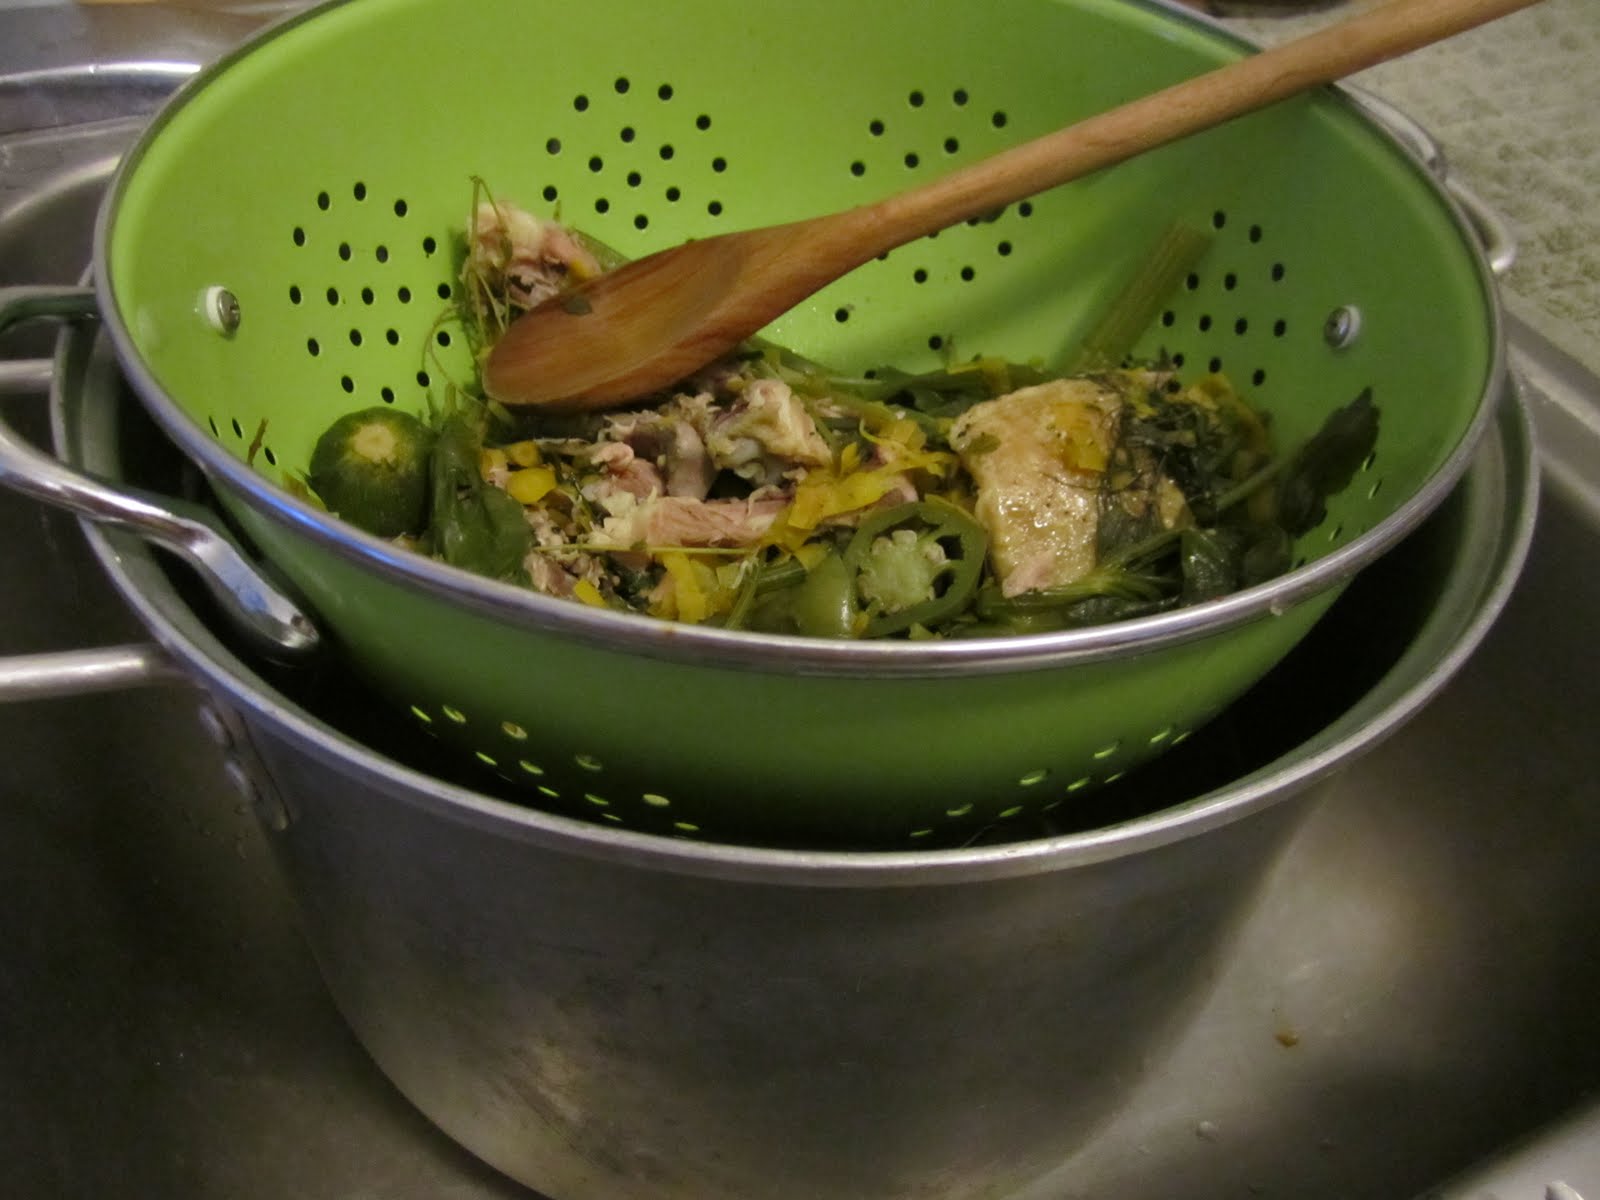
First, making the stock from scratch. So necessary and its a wonderful feeling to know that you have complete control of what your putting in your body, nothing processed or artificial. The stock is just bowling a large kettle of water with all your 'garbage' in it. When I say garbage I mean bones and some skin from your chicken, the ends of your carrots and celery, peelings, and other day old produce sitting in the fridge. for this batch my 'garbage' also included mushrooms, a jalapeno, some buk choy, and a few branches of herbs.  You are pulling all of nutrients and flavor out of your garbage and the result will be the tasty and healthiest stock you've ever had! Add salt to taste (don't under do it) and let this all simmer for a few hours. 


The stock before its strained
strain the garbage out of the stock so whats left in your pot is just liquid. 
put your liquid stock back on the stove top and add your ingredients. Keep in mind that each item takes a different amount of time to cook so first add the celery. Then carrots (tip: don't put too many carrots in, even though its hard not too. In this case you can have too much of a good thing and the carrots will add sweetness to the soup, too many and you've botched your batch) zucchini last and then the secrete ingredient - my chicken is one of those rotisserie chickens from the deli department at the supermarket.    

boil your egg noodles separate and let them go till they are just under cooked. Then at the very end, add them to your soup. Don't put too many noodles in! it will make the soup too starchy and completely  wreck all your hard work! (can you tell that's a mistake I've made before!) 

the second half of making this soup (the part after your stock is made) should only take about an hour. Then you are ready to enjoy! It keeps well for 5 days or so. YUM and ENJOY! 

Tuesday, August 23, 2011

Working with Creative People

I have a new design office at Design Vertigo, its still in the store but now we have spread out to the back. Its so nice to have space to get creative! Sharing the space with me is my interior design intern, Rachael and photographer, Michael Howard from Blu Dot Photography. Blu Dot takes most of the photos for Design Vertigo's events and photo shoots. Its so nice to be able to share an environment with creative people!  Michael also shoots Portraits, Weddings, and Lifestyle photography. He is Specializing in engagement, weddings, senior portraits, children, families, fine art and editorial. His rates are crazy reasonable and hes just an all-around fun guy to work with!  Check out his facebook page often as its always being updated with fun photos and recent jobs. 

Design Vertigo's Summer Fashion Event!

Planning events is one of my favorite things to do. I love to brainstorm a theme and just run with it! You don't have to break the bank either, you just have to get creative! This summer, Design Vertigo hosted its first outdoor fashion show featuring a St. Paul fashion designer Jenny Carle. The theme of the show was 'Make everyday ordinary into everyday extraordinary'. This has been the underlying modo of Design Vertigo since conception... the knowledge that there are more ordinary days in life and why not make them special by wearing cute outfits and using fun products.  
With the decor for the show we took a sustainable approche, fitting in well with both Jenny Carle and Design Vertigo's position. Streamers were made from twine and cut up scraps of old fabric. 
VIP seating for the show was a random assortment of chairs, borrowed from La' Garage and Gallery, a secondhand shop down the street. 
Old paint cans were given a new life by hitting them with a quick spray of paint (in the partys coordinating colors of course) and  then planted sod in and grouped them going down the runway. Topping off the decor was the addition of a few balloons and thats it! 

For refreshments, we kept it simple with pink lemonade and paper cones of freshly popped popcorn.  Time spent preparing all of this was honestly a lot, but as far as dollars and cents my total bills came to about $40. Seriously can't beat that!! 


Amanda Wilde and Jenny Carle

 "Amanda Wilde, owner of Design Vertigo, and Jenny Carle share many of the same philosophies when approaching design, whether it is in Jenny’s fashion or Amanda’s interiors. The joining of these two young and creative businesswomen will make for an amazing fashion show that is sure to be lighthearted, sustainable and most definitely memorable. "
Blu Dot Photography 

Jenny Carle is an independent designer from St. Paul, MN launching her brand, Jenny Carle Designs, in 2008.  She designs are for the woman who enjoys feminine and vintage-inspired pieces, but with a modern and youthful twist. She wants women to feel comfortable and beautiful while wearing her garments, transitioning from a day at the lakes to drinks on the patio. She is committed to making her garments sustainable and chooses to incorporate found and reused textiles. Carle graduated from the College of St. Catherine’s with a B.A. in apparel design and art.


On August 12, 2011 Jenny Carle showcased her collection at a fashion show in North St. Paul, kicking off her four week long trunk show at Design Vertigo. 


Friday, August 19, 2011

Searching for Inspiration...

Today I am aching for inspiration. I need to create, to discover, to feel the power and magic you can only experience when you transform nothing into something. But what? I feel like I've been trapped this summer. Trapped in this store, in this town, in this frame of mind that is just itching for a muse. What should I do, or where should I go? I need to find a place that will spark my mind and stimulate my spirit. Because right now, I feel like I'm standing still and its killing me.